
Steal A Balut Beginner Guide: How to Play
Start with one balut, bring a duck safely back to your base, and use its cash to improve your next run.

Your first run
Steal A Balut is a Roblox collecting game inspired by the Filipino delicacy balut. Crack baluts to hatch ducks, steal them, escape the guards and place the ducks in your base to earn cash.
On your first trip, find your base and a balut, then pay attention to the route back before attempting a steal. Focus on getting one duck home and check the base for the cash it generates.
- Locate your base before leaving.
- Select a tool from your hotbar and approach a balut.
- Watch the target's health bar as it breaks.
- Complete the pickup interaction, return and placement.
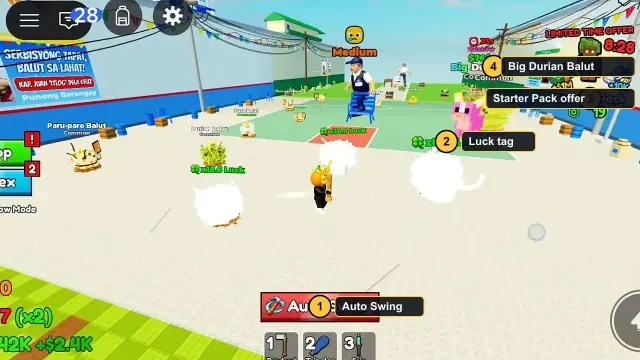
Read a balut's health bar
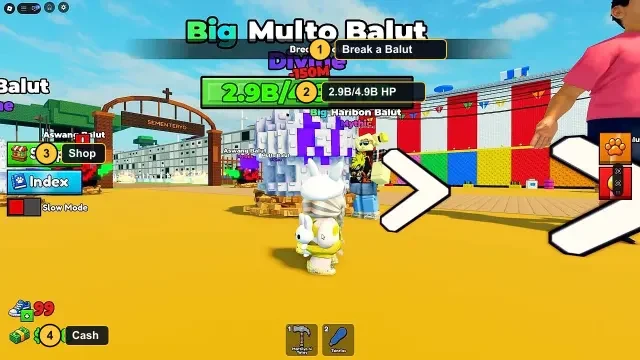
Recorded gameplay shows a Break a Balut objective above a target with a health bar. Use that bar to judge whether you are making progress. A target with a very large health pool can occupy a long part of a session; there is no need to copy a late-game target from a video when learning the loop.
The court screenshot also shows Auto Swing. Check its current state and the equipped tool before assuming that standing near an egg will crack it. Tool controls can differ by device; use the labels your client actually presents.
Escape and return to your base
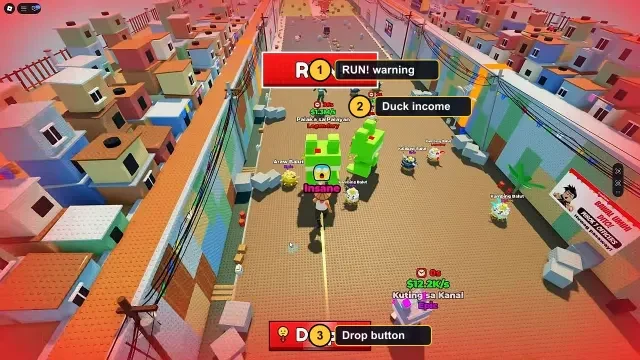
Watch for guards during a steal and look for a clear way back to your base. If a run fails, use what you observed about the route to plan the next attempt instead of spending all your cash at once.
Place the duck in your base after escaping. Check the on-screen cash feedback so you can see when your collection is contributing to your balance.
Choose your first upgrades
The game describes upgrades for speed and tools. Speed may help you travel and escape; tools help you progress through the cracking part of the loop. Compare the options shown in your current game before buying.
Try changing one upgrade at a time and repeat a familiar run. That makes it easier to judge whether it helped with the part that was slowing you down.
Place and manage your pets
After reaching your yard, follow the placement prompt on your device. Getting home and completing placement are separate steps; check that the pet is placed and active before starting another trip.
The game introduction calls hatchlings ducks, while footage described by the reference wiki also shows an All Pets inventory. Compare your own active pets using the income shown in your game.
Fill the Index
Use Index when your goal is a missing collection entry. The reference wiki documents unknown entries marked ??? and a Claim All control in recorded gameplay. Read the reward information in your own client before claiming; the button label does not establish a fixed reward.
All Pets answers a different question: which pets do you own and which are active? A newly discovered name may advance collection while an older specimen remains the stronger earner.
| Screen or label | What to check | Decision it helps with |
|---|---|---|
| Index / ??? | Missing collection entries | Choose a new collection target. |
| Claim All | Displayed eligibility and reward | Claim only what the current interface offers. |
| All Pets / View All | Owned specimens and their rates | Review candidates for an active slot. |
| Active count | Used slots versus capacity | Decide whether to replace a pet or consider capacity. |
Troubleshoot the first run
Find the first unfinished step in the run. Changing several settings at once makes it harder to tell which action helped.
| Problem | First check | Next action |
|---|---|---|
| Balut health does not move | Tool selection and swing state | Confirm the equipped tool and use the displayed attack control. |
| You keep losing the way home | Base location and landmarks | Learn one recognizable return route before taking another pet. |
| Pet reaches home but income is unclear | Placement prompt | Finish placement, then inspect the active list. |
| New collection entry earns less | Rate of the actual specimen | Keep collection progress separate from your active earning lineup. |
Tools: owning, equipping and buying
Open Martilyo Shop and distinguish the selected hammer from other owned options. The reference wiki records Equip on an available owned hammer and Equipped on the selected one. Buying a tool and selecting it are separate actions.
For context, an October 27 recording documented by the fan wiki shows the following Power labels. These are historical examples, not a complete tool ranking or a current shop-price list. Power alone does not establish a precise number of swings.
- Check the current Equipped state.
- Compare owned alternatives before opening a purchase offer.
- If buying, read the currency and current price.
- Select the intended owned tool and confirm Equipped before returning to a target.
| Tool | Recorded Power | How to use the comparison |
|---|---|---|
| Videoke Champion | 100K | Compare with your currently equipped tool. |
| Balikbayan Bonk | 250K | Check whether it is owned and offers Equip. |
| Jeepney King | 1M | Largest Power among these three recorded examples. |
A practical end-of-session checklist
Finish the return you are carrying, check the placed pet and note one clear goal for next time. A missing Index entry, a replacement earner and a tool upgrade are separate goals; choosing one makes the next trip easier to plan.
If an event announcement appears, read the actual location and timer in your server. Videos can contain event-only scenery, high luck and temporary offers, so do not expect every screenshot to match an ordinary session.